Boomerang: Drive wheel swapUpdated 3 months ago
During the normal operation of the Boomerang, the drive wheel will develop a “groove” where the cable rests on the drive wheel. If the “groove” progresses to the point where you can no longer adequately tension the drive wheel, it’s time to replace your drive wheel with a new one.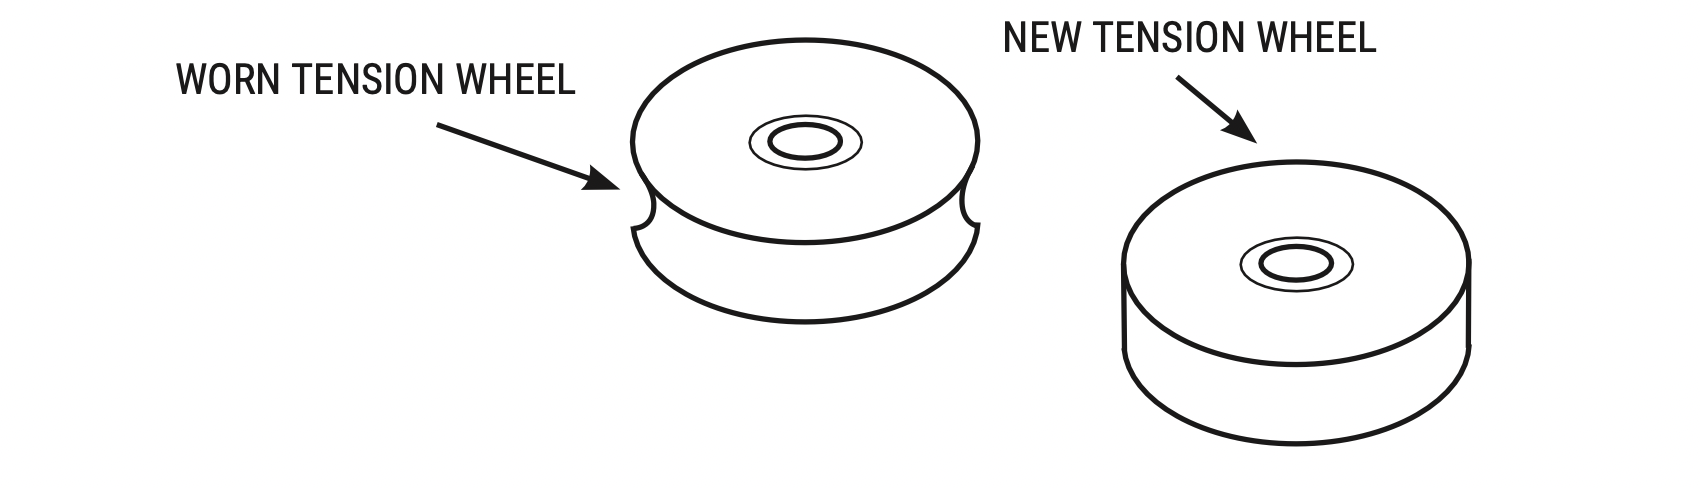
Step 1: With the Boomerang completely removed from the cable, remove both the left and right plastic shrouds using the included Allen wrench.
Step 2: Remove the nut and shoulder bolt which holds the drive wheel in place between the Boomerang’s side plates.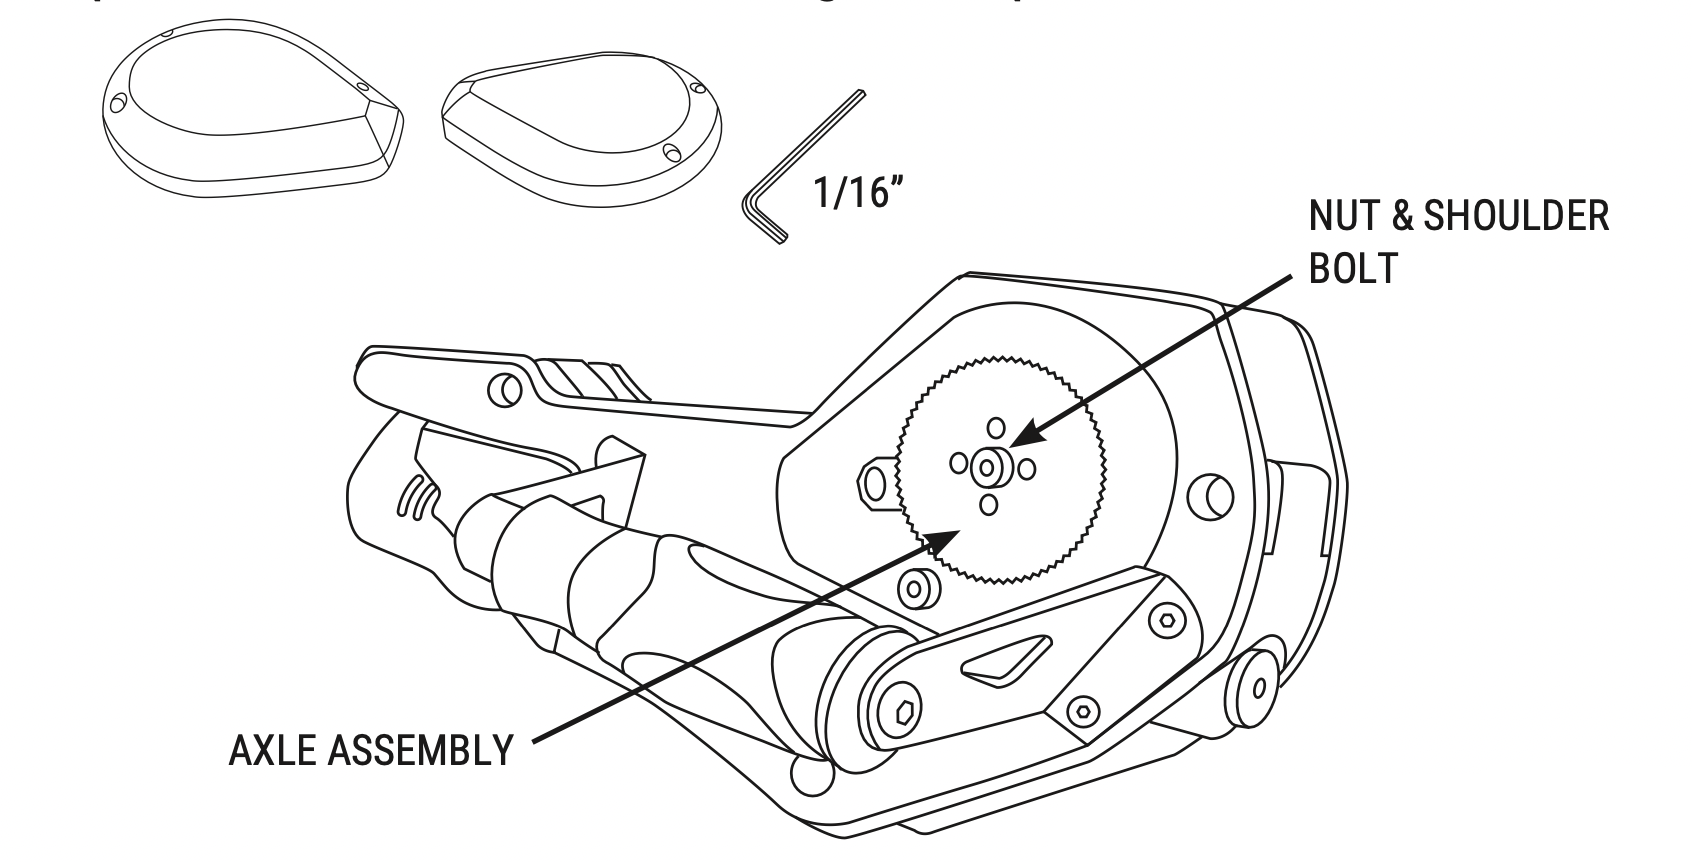
Step 3: You’ll notice as you remove the drive wheel, it contains two steel inserts on either side of the drive wheel. Remove the inserts from the old drive wheel. To install the inserts on the new drive wheel, you’ll use the included installation bolt and wing nut.
Place the insert on the bolt, and thread the new drive wheel on behind it. Once the drive wheel has been added to the bolt, add the second insert to the bolt. Proceed to tighten the wing nut, which will force the two inserts into the correct positions in the new drive wheel. Once the inserts have been sufficiently pressed in, you can remove the wing nut and bolt.
Step 4: Re-insert new drive wheel back into the pivot assembly. Insert the shoulder bolt with attached gear assembly through the assembly and re-attach the nut on the side with the motor wires like before.
Step 5: Being careful not to pinch the motor wires, re-attach both plastic shrouds using the included Allen wrench.
Be sure to re-adjust your drive wheel tension before your next riding session.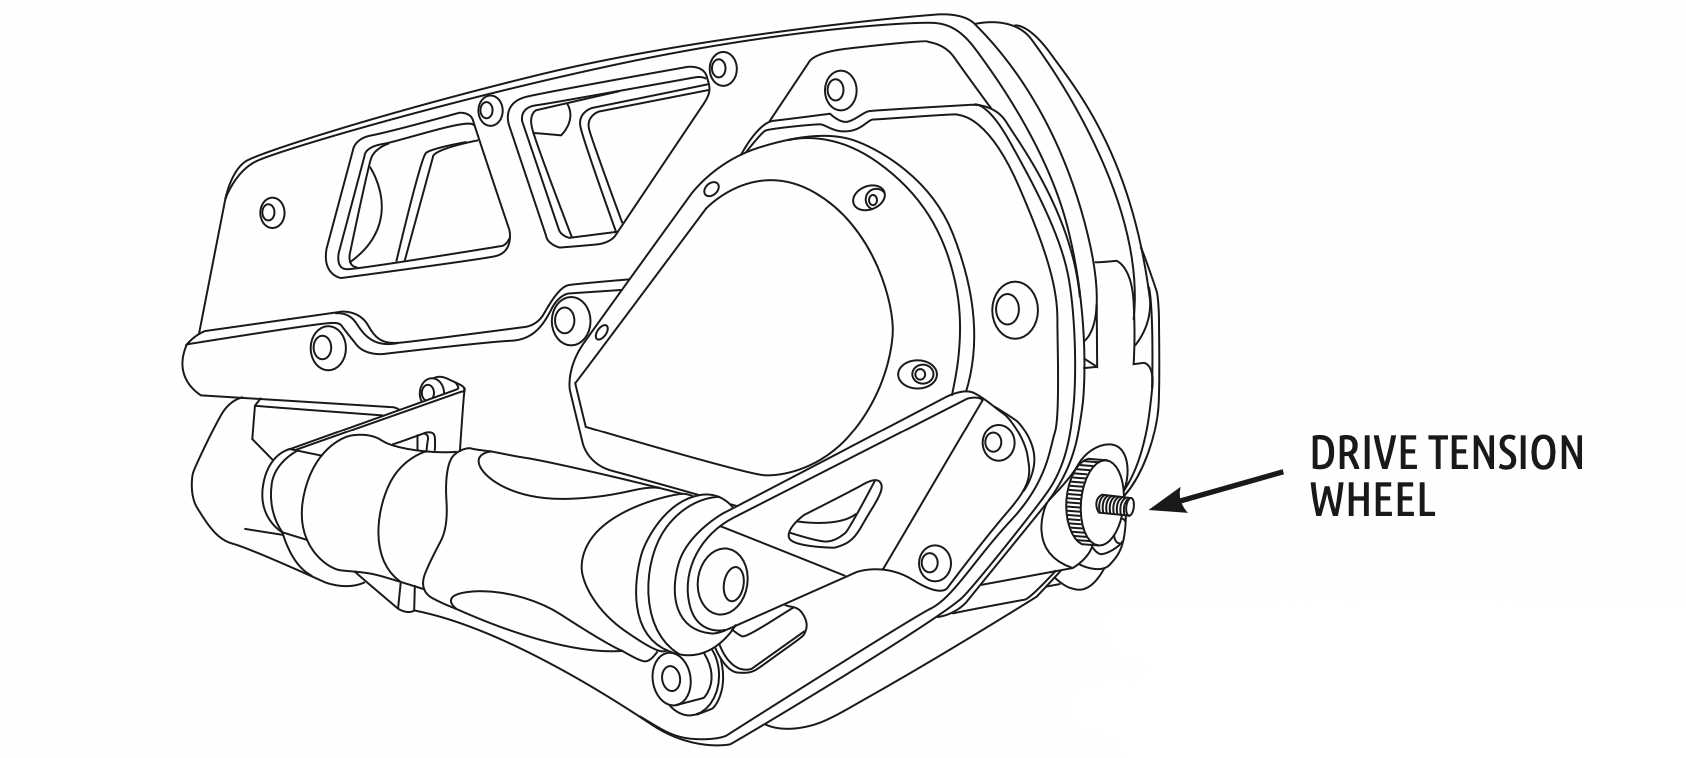
We STRONGLY recommend that you review our “Drive wheel swap” instructional video before attempting to replace your drive wheel.